Pete Millett’s Jonokuchi desktop headphone and small speaker amplifier
Pete Millett. The man, the myth, the legend.
I can’t remember exactly how I first learned about Pete Millett but one of my first DIY headamps was the Butte, one of his projects. It is still one of my favorite little solid state amplifiers.
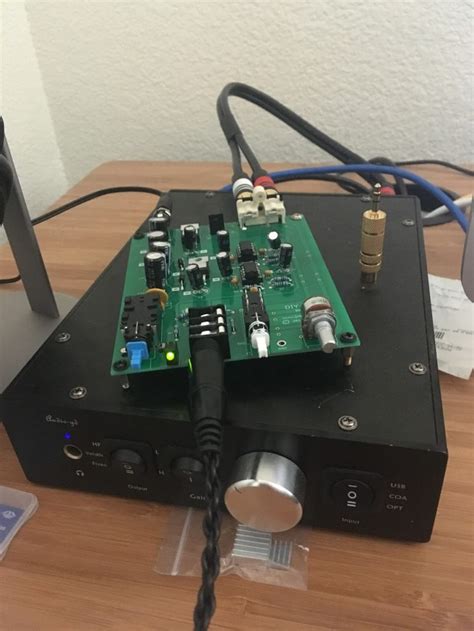 my first unhoused Butte build from years ago
What I love is that Pete has something to strike the right balance of fun and challenge for every skill level. He provides enough information to get you started, but not enough to hold your hand. The Butte was something you could build even if you could not really solder. But if you have a little experience, he lets you know how to mod it to class-A. It’s not something a total noob would do, but it’s definitely something you could try after a little practice.
It’s basically the perfect little starter project.
After building that first Butte, I built a few more small amplifiers, including another one or two of Pete’s designs. They were all fun and worthwhile projects to hone my skills, and though I still sorta sucked at the whole thing, I felt I was ready to build something substantial. I decided to give the Jonokuchi a try. It means the lowest rank in sumo wrestling, after all. Perfect for a real tube amp learner.
Being the first real tube amp I built, it was the first one that was high voltage, used big transformers, used tubes for more than just a pretty glow, and had a danger warning on the PCB. It’s the first project I built a dim bulb tester for. I also needed to figure out an enclosure that was large enough to house it.
The enclosure sounded scary, but Pete provided some good guidance.
- You can call Front Panel Express and let them know you’d like a Jonokuchi chassis. They’ll know what that is and fabricate it for you. This is the easiest, highest quality, and most expensive option.
- You can use his drilling plans and drill stuff yourself. He suggests a Hammond 1444-22 chassis as the base. The quality is as good your work.
- You could do something completely different.
I went for the second option. I like cheaper and like to build, so buying a Hammond chassis and spending time with my drill press sounded like fun.
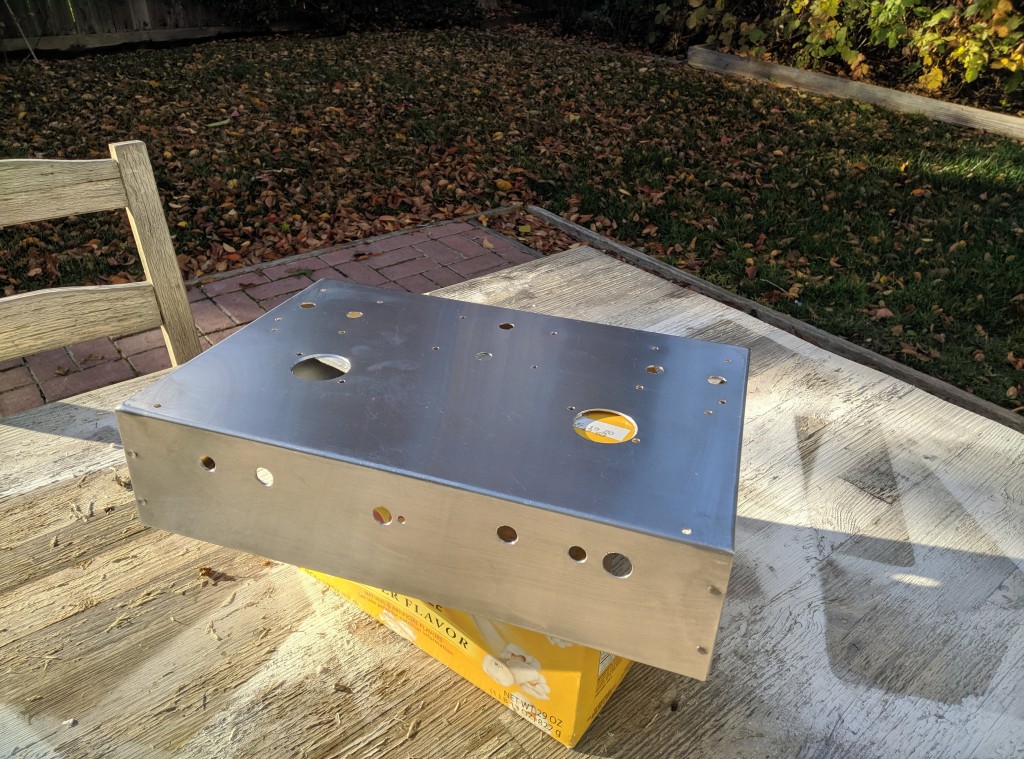 Drilled out and getting ready for primer
Drilling was uneventful and easy, especially since Pete provided a drilling plan. Honestly, I find doing that style of work calming, almost zen-like. After drilling, it was primed and painted. Good ‘ol matte black spray paint did the job.
In terms of the actual amplifier, its construction is fairly uneventful. The part count is not high, and nothing requires precise soldering. The transformers are from Edcore and they have a literal page to order the set. You’ll need to wait a month or two for them to arrive. A pair of 13EM7 tubes are fairly cheap on eBay and plentiful. The only real thing to pay close attention to is tube socket orientation and correctly identifying which transformer wires get soldered where. They are color coded on the PCB but the colors identified on the PCB may not actually match those on the transformer.
On first power on and listening, I heard a faint hum in the background. Womp womp.
The bad news: It turns out Pete found that some builds seem to have issues with hum, just like my build.
The good news: There are a number of options to address it.
The two major options, and the ones I implemented, are:
-
Add resistance to the output and headphone jack.
Doing this requires difficult desoldering of the output switch and inserting resistors into the switch’s legs. I completely fucked this up and ended up needing to completely remove the switch solder wires from pads on the other side of the board to its legs. It’s functional but looks awful. I look at it as one of my many teachable moments.
-
Improve the PSU filtering by replacing the series resistor between the filter caps with a choke. Pete suggested the ultra-cool MEC-100 and I bought one of those puppies and installed it.
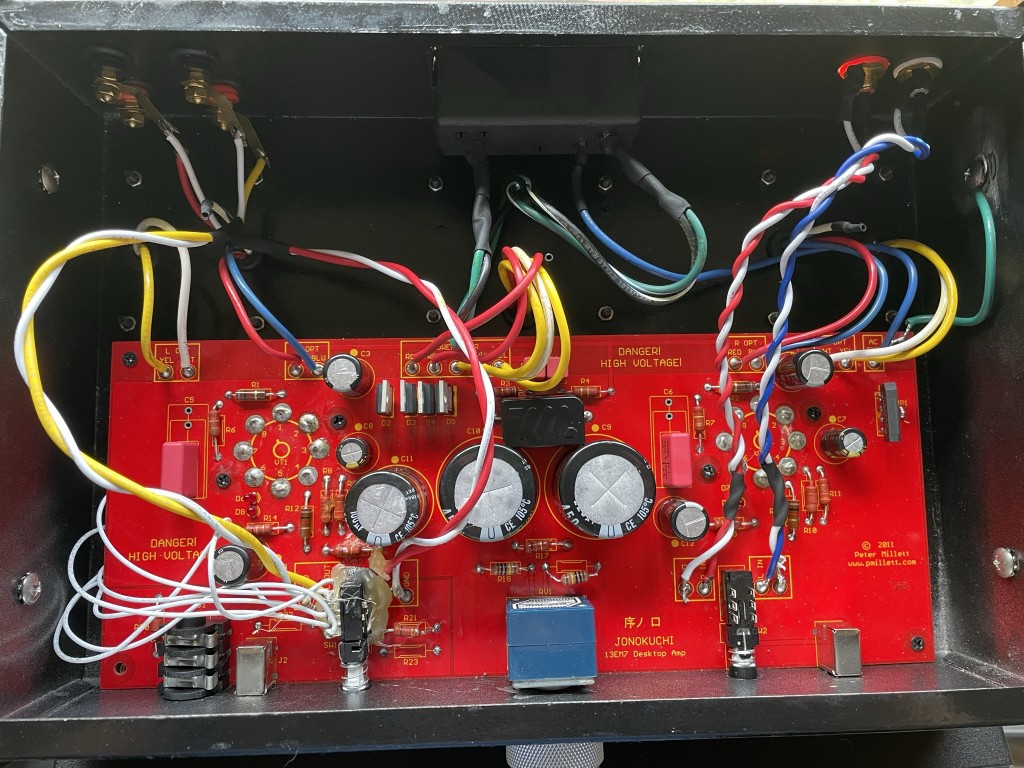 You can see the choke (black box above the two large caps) and the insane mess of wire and hot glue on the switch.
Because I completely butchered the PCB trying to add resistance for #1, I had to use hot glue to keep it stable. Like I said, it’s not pretty.
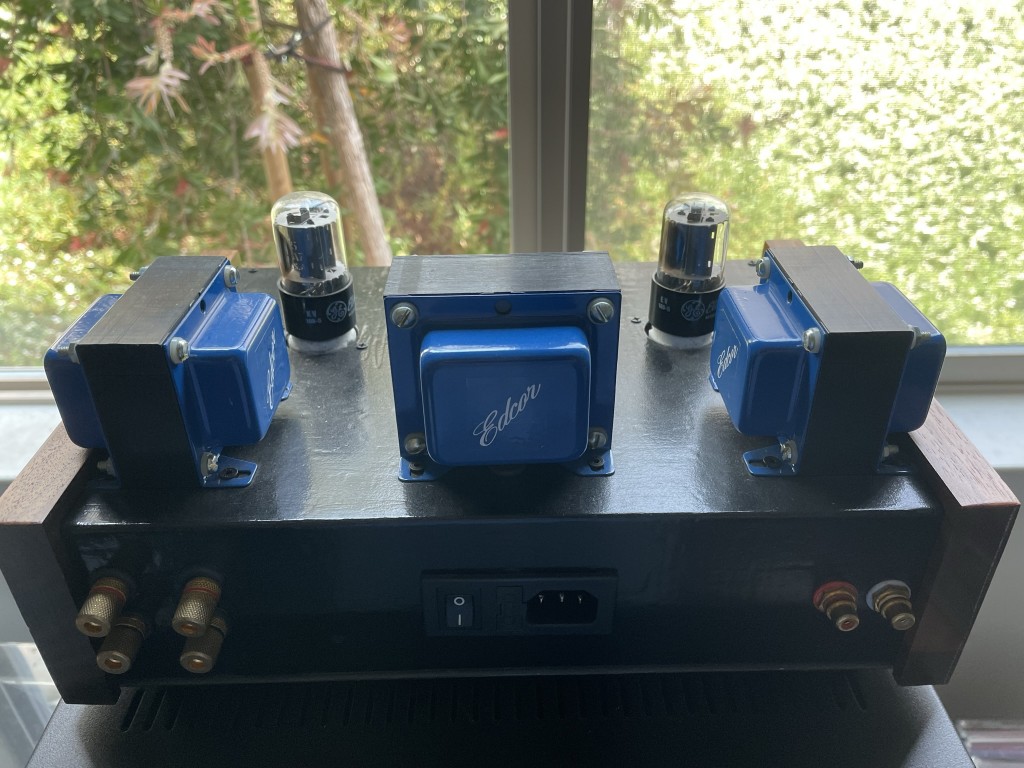
By buttoning up the whole thing, it looks much less messy.

How does it sound?
Well, I said my build suffered from some fairly distracting hum. Neither the added resistance nor the choke eliminated it for me. They both helped, and the hum is pretty faint, but it’s there and too distracting for me. It’s also one of the physically messiest of my builds — the soldering is OK but not great; I didn’t do a good job with wire management; I didn’t twist wires that should be twisted; and there is the entirely messed-up switch and portion of the PCB. I would love to re-do it, but Pete appears to not have any more Jonokuchi boards, so… I want to keep this one.
What I may actually do at some point is transplant it to a different chassis. Build a nice gravity chassis like the Dust Bowl. Make it big and provide more space for the transformers. Properly take care of the wires. I reckon that would actually help the hum. For an experienced builder, I also believe a point-to-point build would be better.
The Good
- Great documentation from Pete
- Parts are readily available
- Easy to complete
The so-good-it’s-bad
- A known issue is identified with mitigation steps
- Easy to build also means easy to make mistakes wit high voltage equipment! Danger, Danger!
The Bad
- High probability of hum problems, and it’s distracting
- It can technically power small speakers! But not really.
- PCB does not seem to be available any more